
In this tutorial, we use the powerful Feeds module to import data from Drupal Planet's RSS feed into our website, in the form of Article content type nodes.
Make sure you also check our automated news aggregator tutorial; it utilises the RSS Feeds module but also combines it with the ECA and ChatGPT integration modules.
The Feeds module - Introduction
The Feeds module provides a means to import or aggregate data into nodes, users, taxonomy terms, and other content entities through a user-friendly web interface, eliminating the need for manual migration coding. It supports the importation of data from diverse formats including CSV, JSON, XML, and RSS feeds.
Main features overview
The Feeds module can be used to:
- Import content into our website via the module's dedicated UI
- Import content into nodes, users, taxonomy terms or other content entities
- Map - on a granular level - input elements to Drupal content elements
- Transform data before the import takes place, using the Feeds Tamper module
- Batch import for large files
- Export your feed's configuration and import it into another site via web UI
- Perform one-off imports and periodic aggregation of content
- Import or aggregation from RSS feeds, Atom feeds, OPML files or CSV files
- Import from XML, HTML, JSON or QueryPath using the Feeds Extensible Parsers module
- Create and maintain feeds with PubSubHubbub support
- Import any other kind of content
Installing the Feeds module
To install the module, we'll grab its latest stable version from the official drupal.org page of the module: https://www.drupal.org/project/feeds. Towards the bottom of the page, we can see the following information about the module:
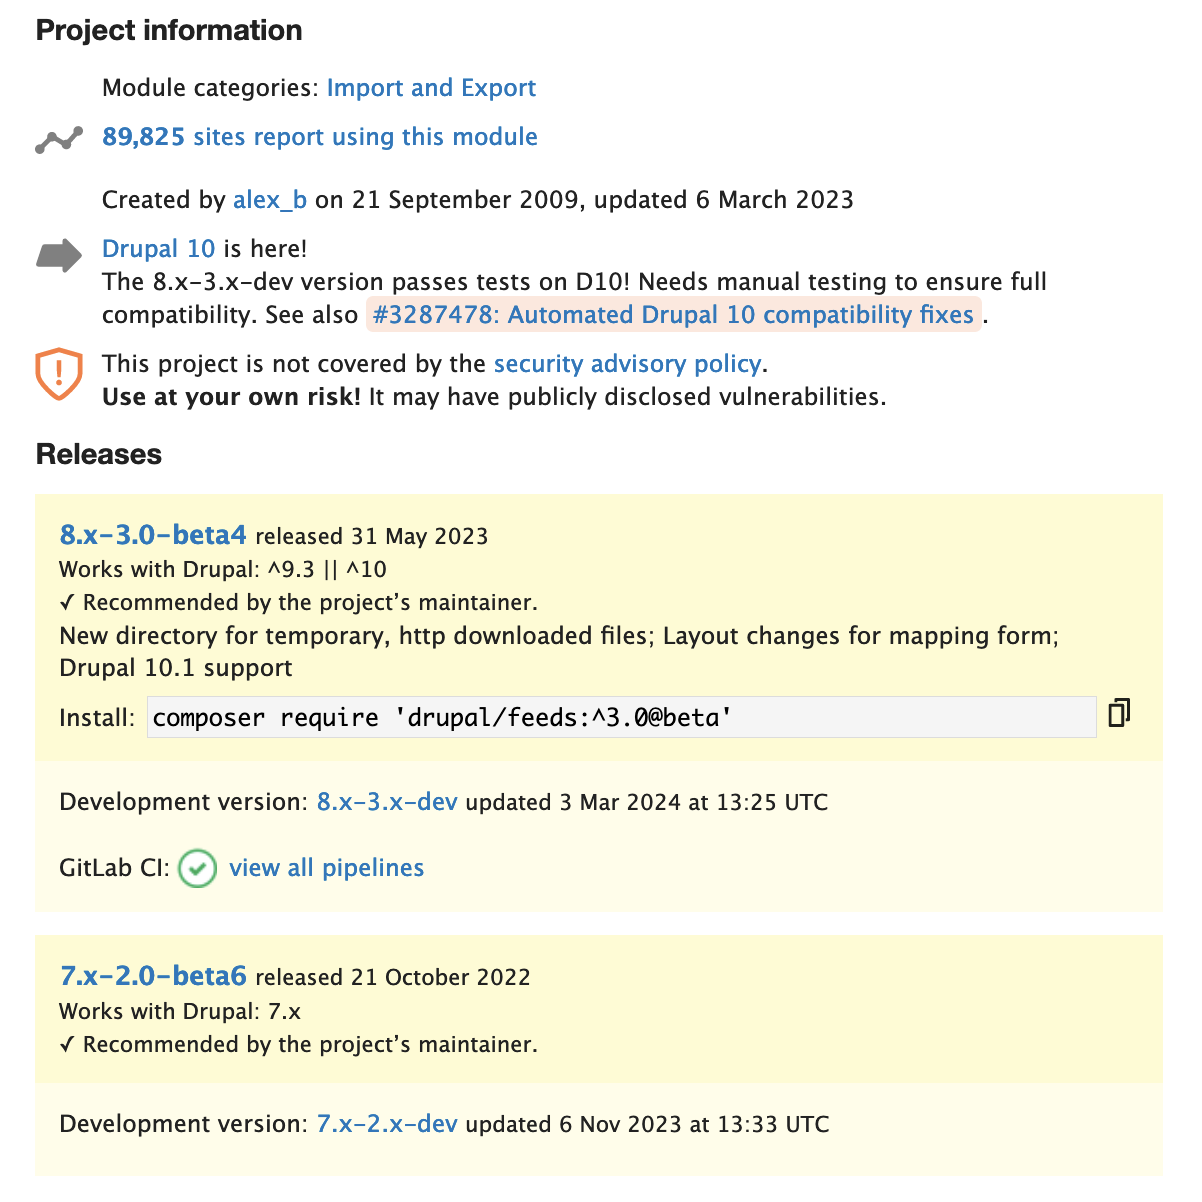
The latest version compatible with Drupal 10 (at the time of writing) is 8.x-3.0-beta4. While this is not the most stable release we would prefer to install on our site, it's stable enough for most of the purposes this module serves (make it your habit to follow the good practice of scanning the open issues of the modules you install in order to identify any high risk issues present in the version you're adding to your website).
To install the module, run the corresponding command on your Terminal / Command Line / Shell, in your project's directory:
composer require 'drupal/feeds:^3.0@beta'Then, using drush (or on the Extend screen /admin/modules), we enable the module:
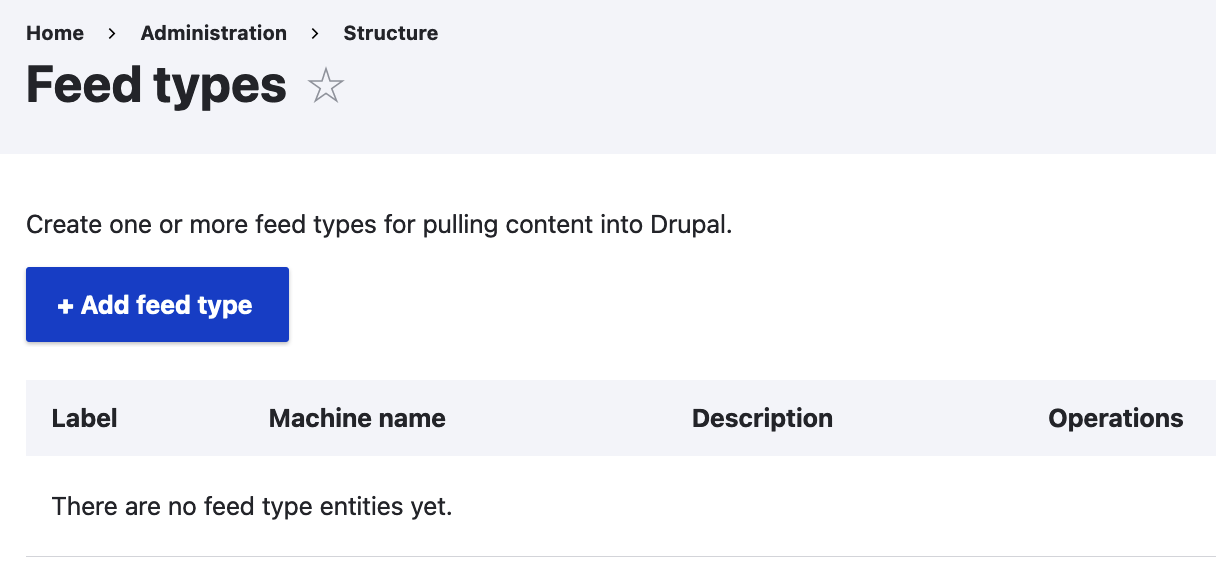
drush en feedsThe configuration screen provided by the module should now be available under /admin/structure/feeds and we'll use it below to create our first feed:
The module comes with a sub-module called Feeds log, which provides detailed logging and reporting for Feeds imports. On the Extend screen (or using drush as with the main module above), we enable the Feeds log sub-module too. It comes with a handy configuration screen under /admin/config/content/feeds_log:
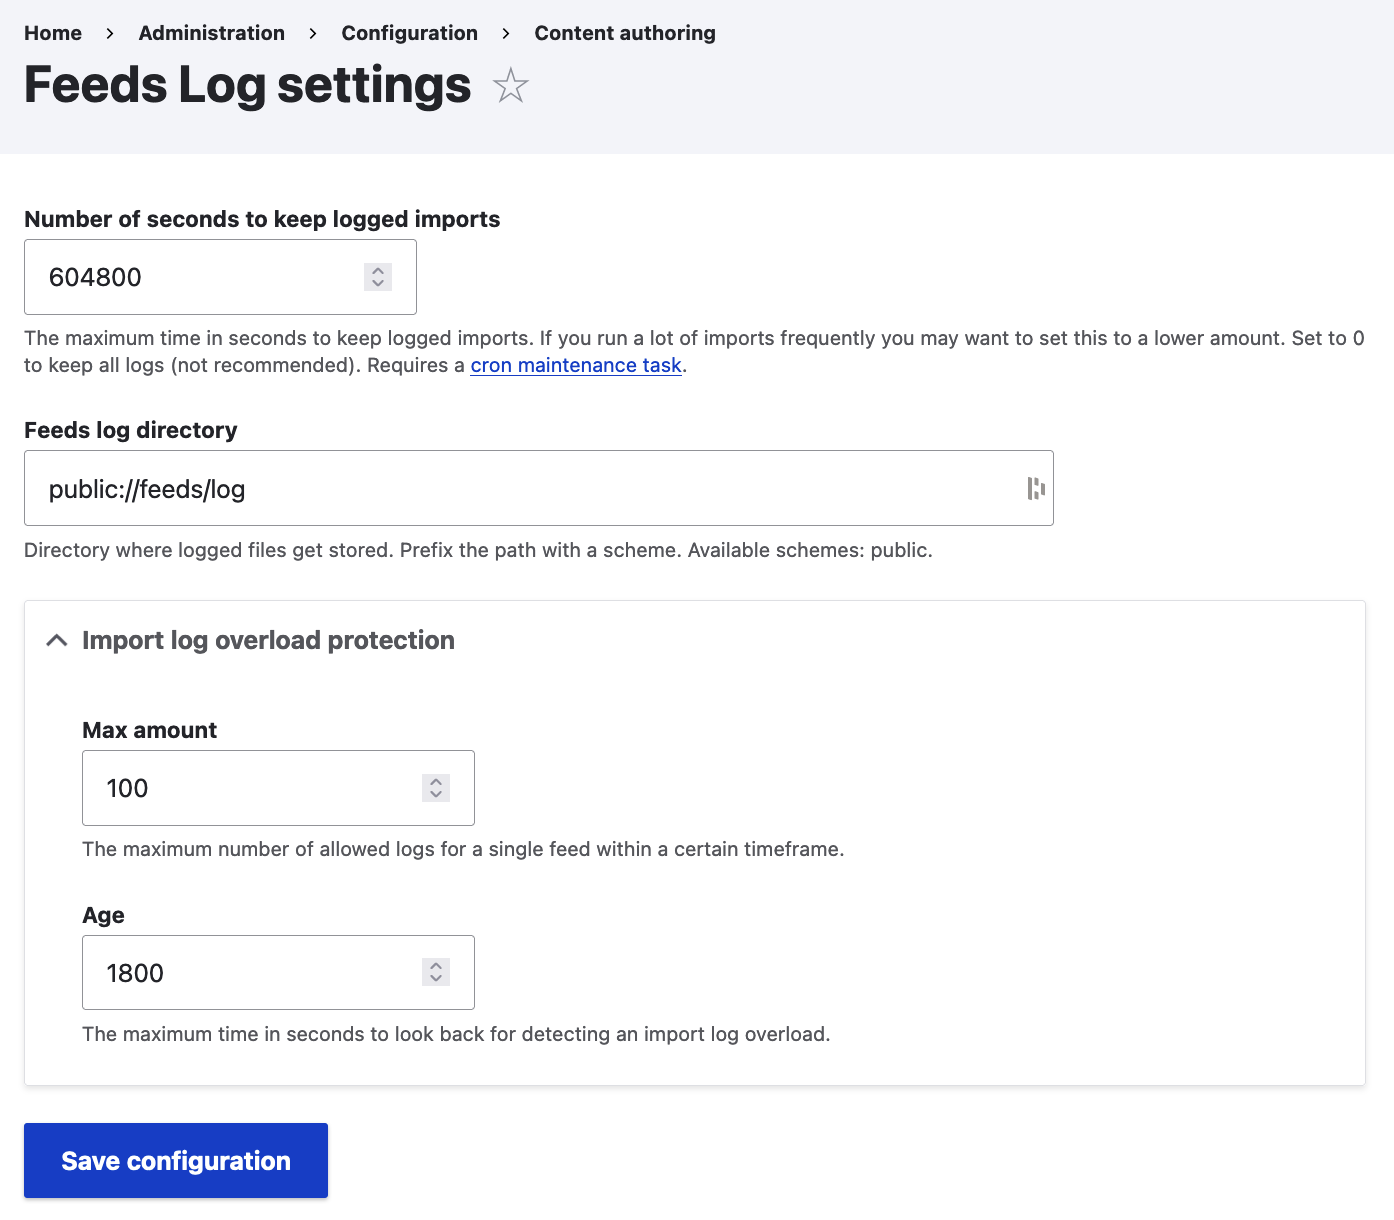
Most of the settings on this screen are there to protect us from a log overload so it's best to start with the recommended settings and gradually increase the amounts as needed. Regarding the feed logs directory, you can (should) use a non-public file scheme such as temporary://feeds/log or private://feeds/log but, for the purposes of our demo, we'll use public://feeds/log as the directory where all feed logs will be stored.
How to create and edit a feed
1. Adding a feed type
The first thing we need to do in order to create our first feed in Drupal is to create a new feed type on /admin/structure/feeds:
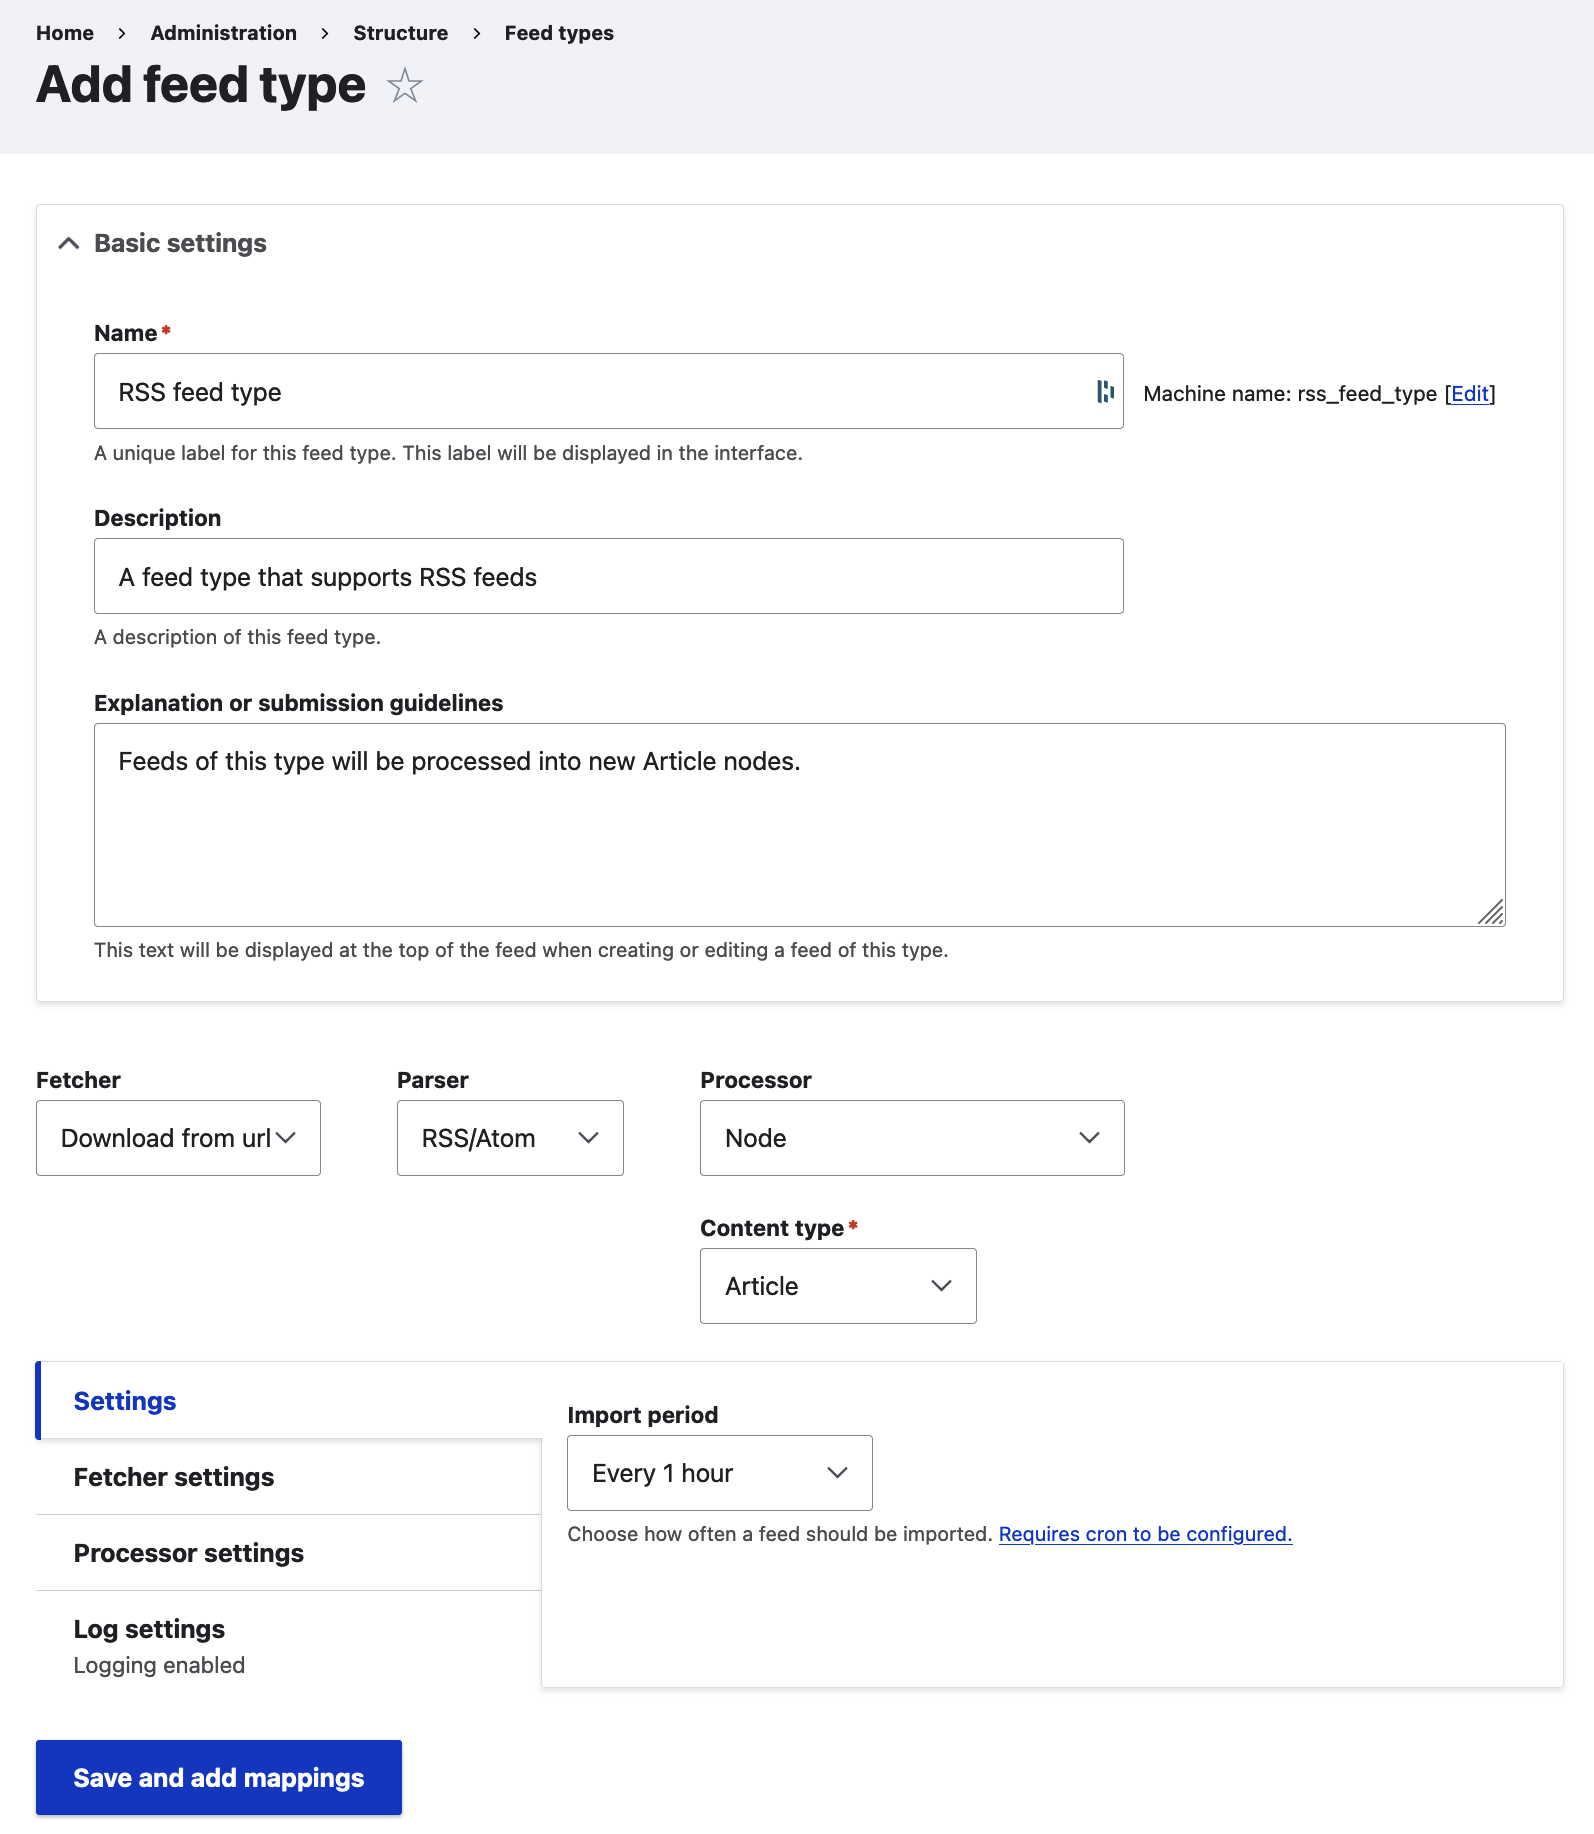
1.1. Basic settings
Feel free to populate these text fields with helpful information about the nature and use of your new feed type. For the purposes of our demo, we are creating a new RSS type of feed that will periodically generate nodes of the Article content type.
Fetcher
For this tutorial, we want to periodically fetch new content from an online source so we'll select the "Download from url" option from the Fetcher dropdown (the other two available options, "Directory" and "Upload file" refer to Drupal generating a feed from public local files present in the project file structure, and from files manually uploaded in to a user-defined directory, respectively).
Parser
There are four different options available in the Parser dropdown and most of them follow the XML (Extensible Markup Language) format. For our demo, we'll select the "RSS/Atom" option:
CSV (Comma-Separated Values): This refers to the popular text file format that uses commas to separate values and newlines to separate records.
OPML (Outline Processor Markup Language): An XML format for outlines (defined as "a tree, where each node contains a set of named attributes with string values").
RSS/Atom: This is the option we are going with for our demo and it refers to the the most popular syndication formats in XML. A myriad of news aggregators have been using RSS to keep track of many different websites, removing the need for the user to manually check them.
Sitemap XML: This is self-explanatory and targets websites' sitemaps, always in XML format.
Processor
This refers to the entity type we want to generate from our RSS feeds. The options available in this dropdown depend on your site's setup. For our RSS feeds, we will be generating nodes.
Content Type
Similarly to the Processor settings above, the options here also depend on your setup and for this guide we'll be generating new nodes of the Article content type.
1.2. Fetcher Settings
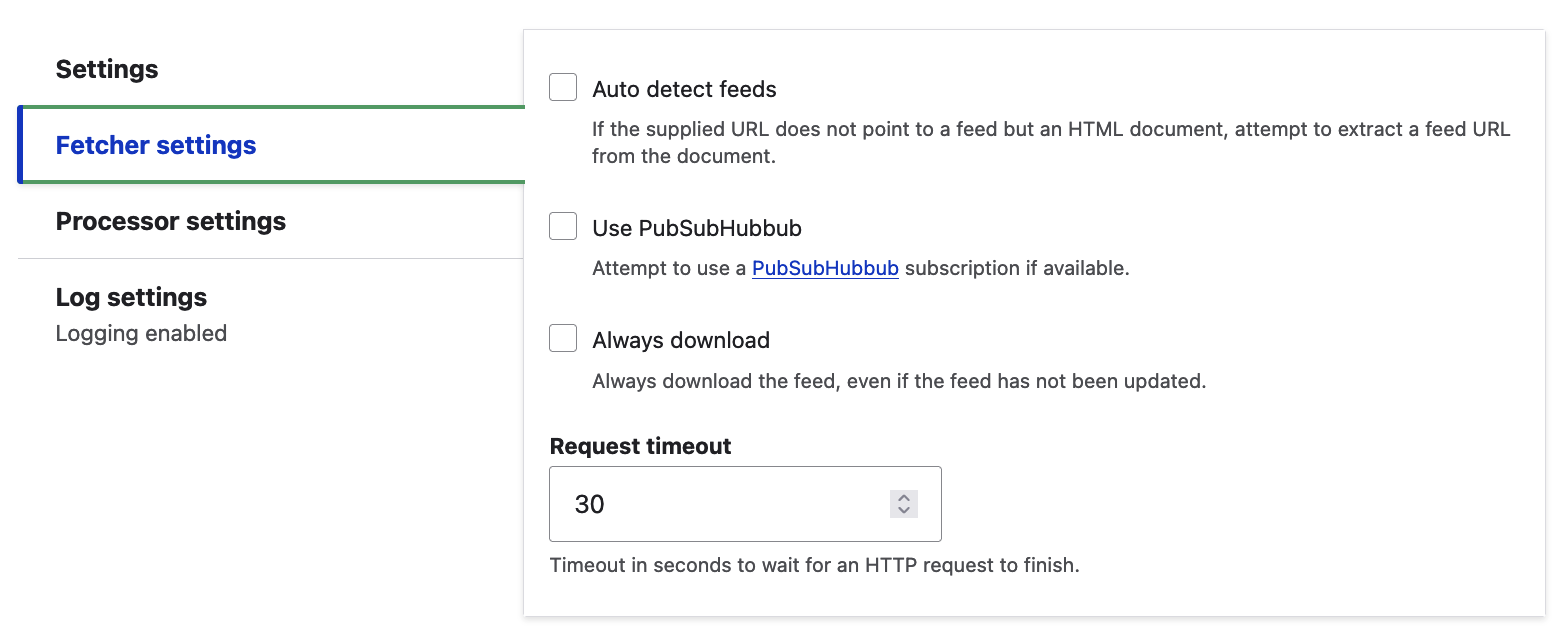
Most of the options here are easy to follow and understand and we'll leave the default values untouched. You can read more about PubSubHubbub here: https://en.wikipedia.org/wiki/WebSub.
1.3. Processor Settings
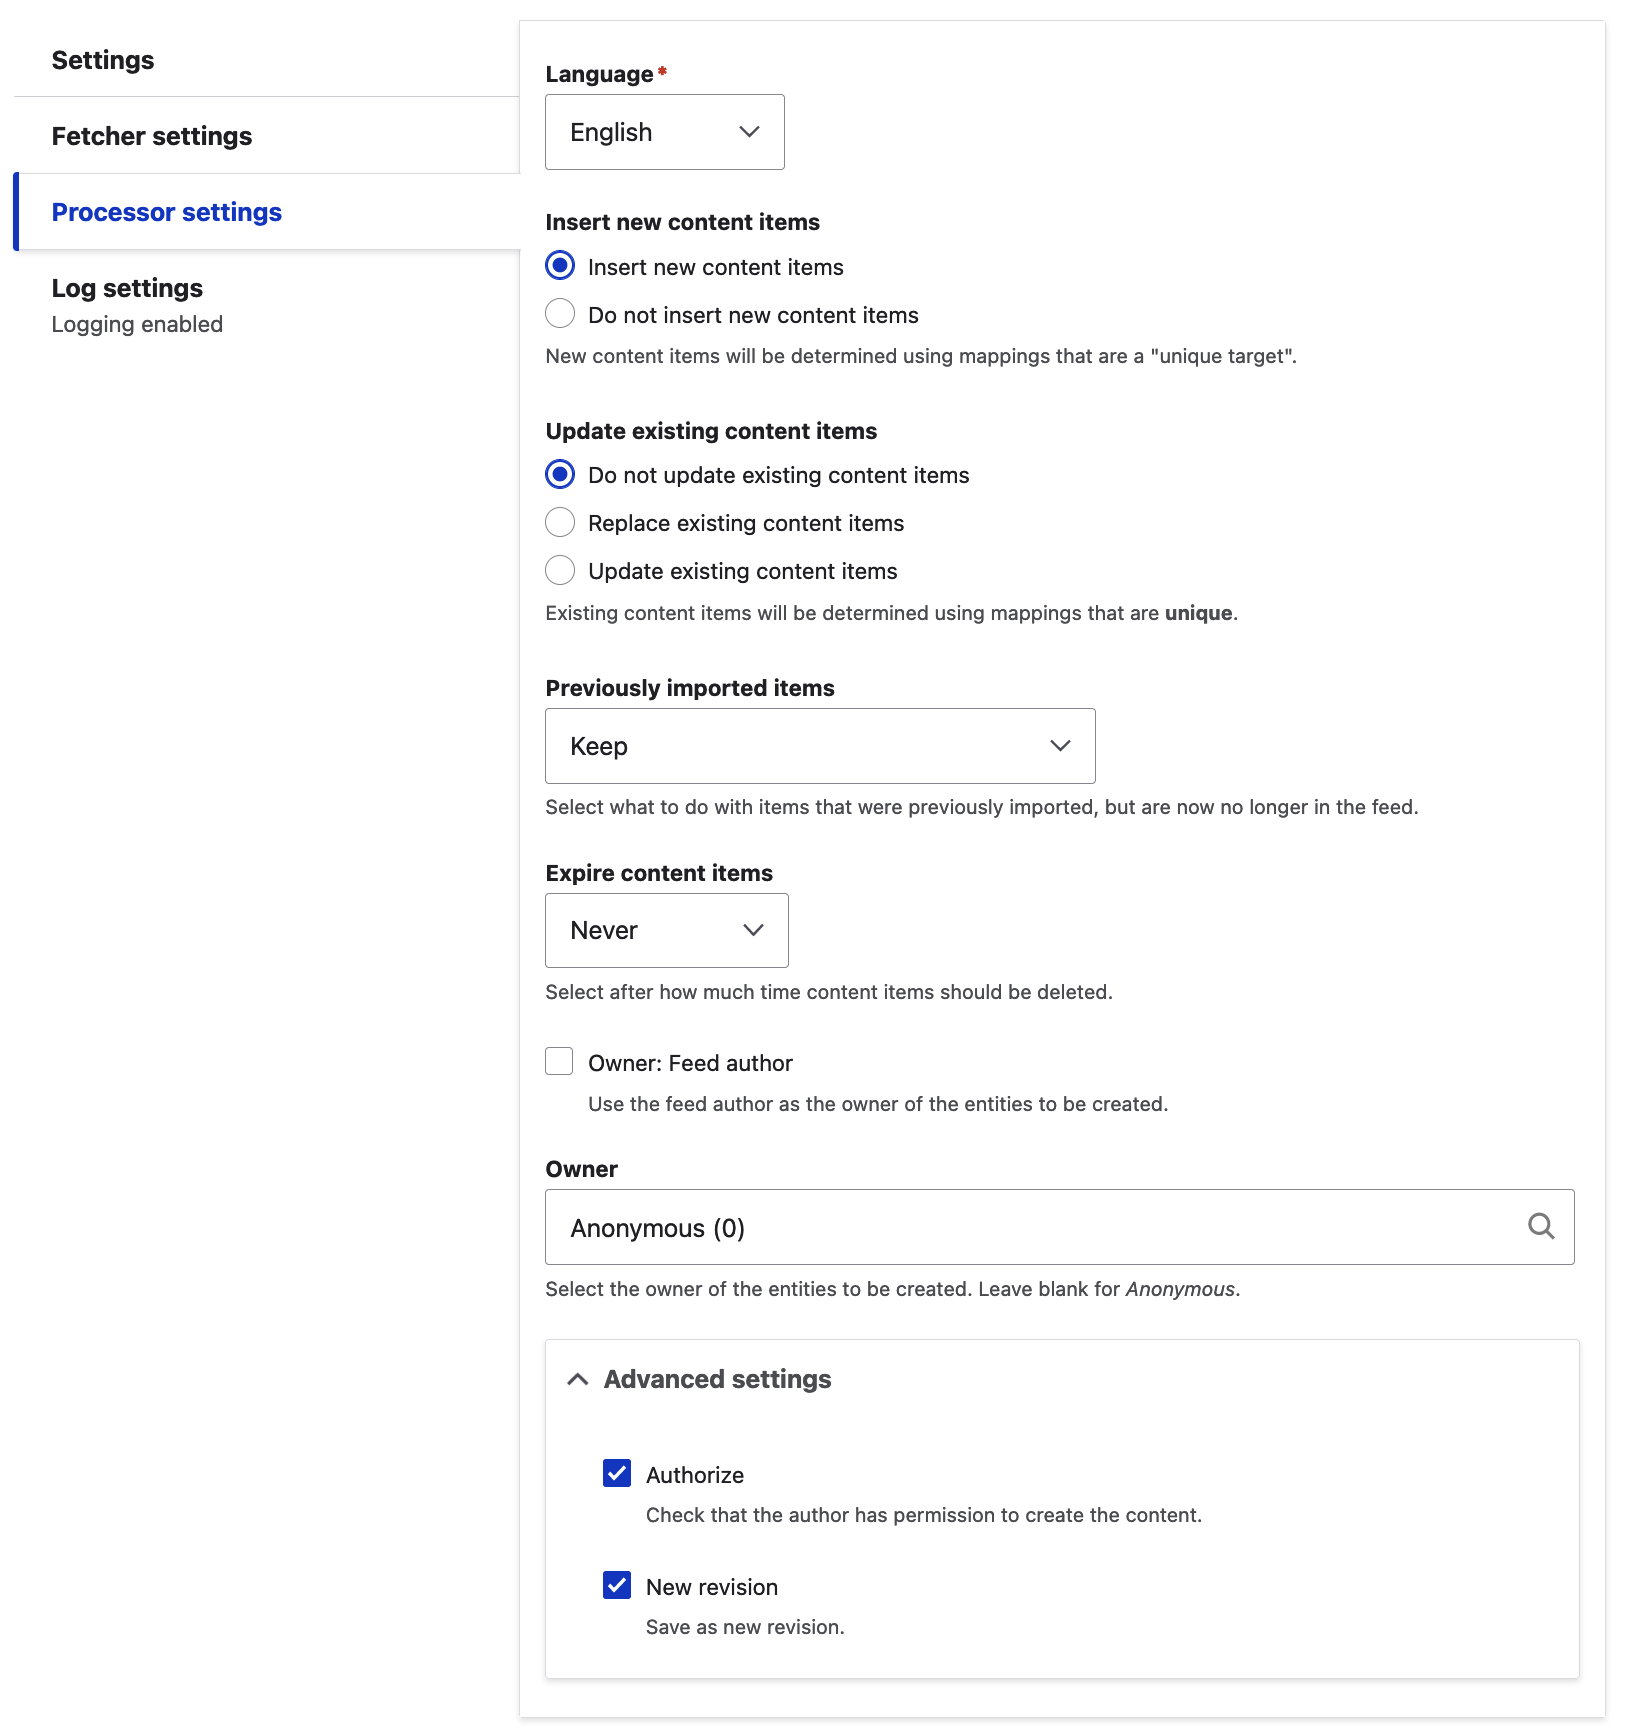
Again, we'll leave the default values here too. Most of the settings here dictate what happens with the incoming data and how it gets processed. Feel free to change these settings to your needs and also make sure you've selected the right Drupal role as the owner of the new Drupal entities that this module will generate (we've left the default value of Anonymous here).
1.4. Log Settings
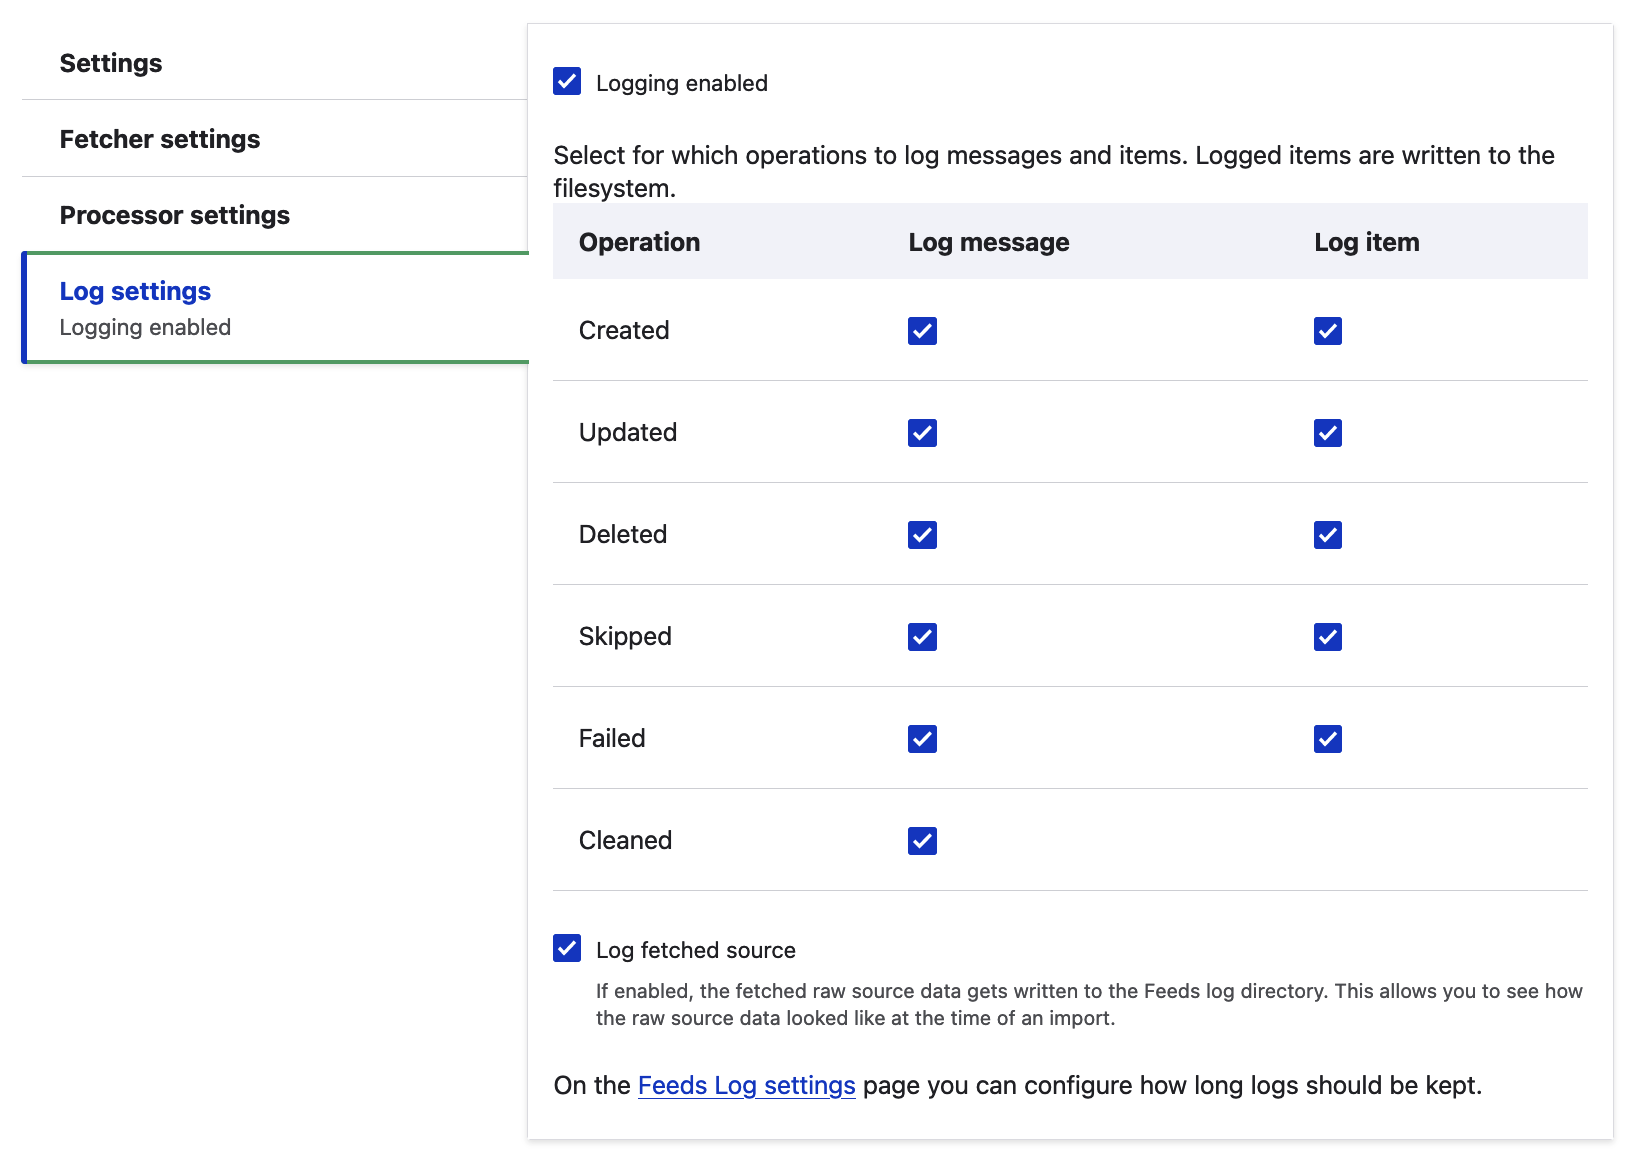
This tab allows us to choose how detailed we want logging to be for our feeds. You can leave the default settings on for now - it'll become clearer whether you need to limit the amount of logs generated or not after you've experimented with your first few feeds.
We've now finished setting up our first feed type! Click on "Save and add mappings" to save the new feed type and move on to the next screen, "Mappings"!
2. Drupal feed mappings
On this screen, we'll be editing the mapping of our feed type:
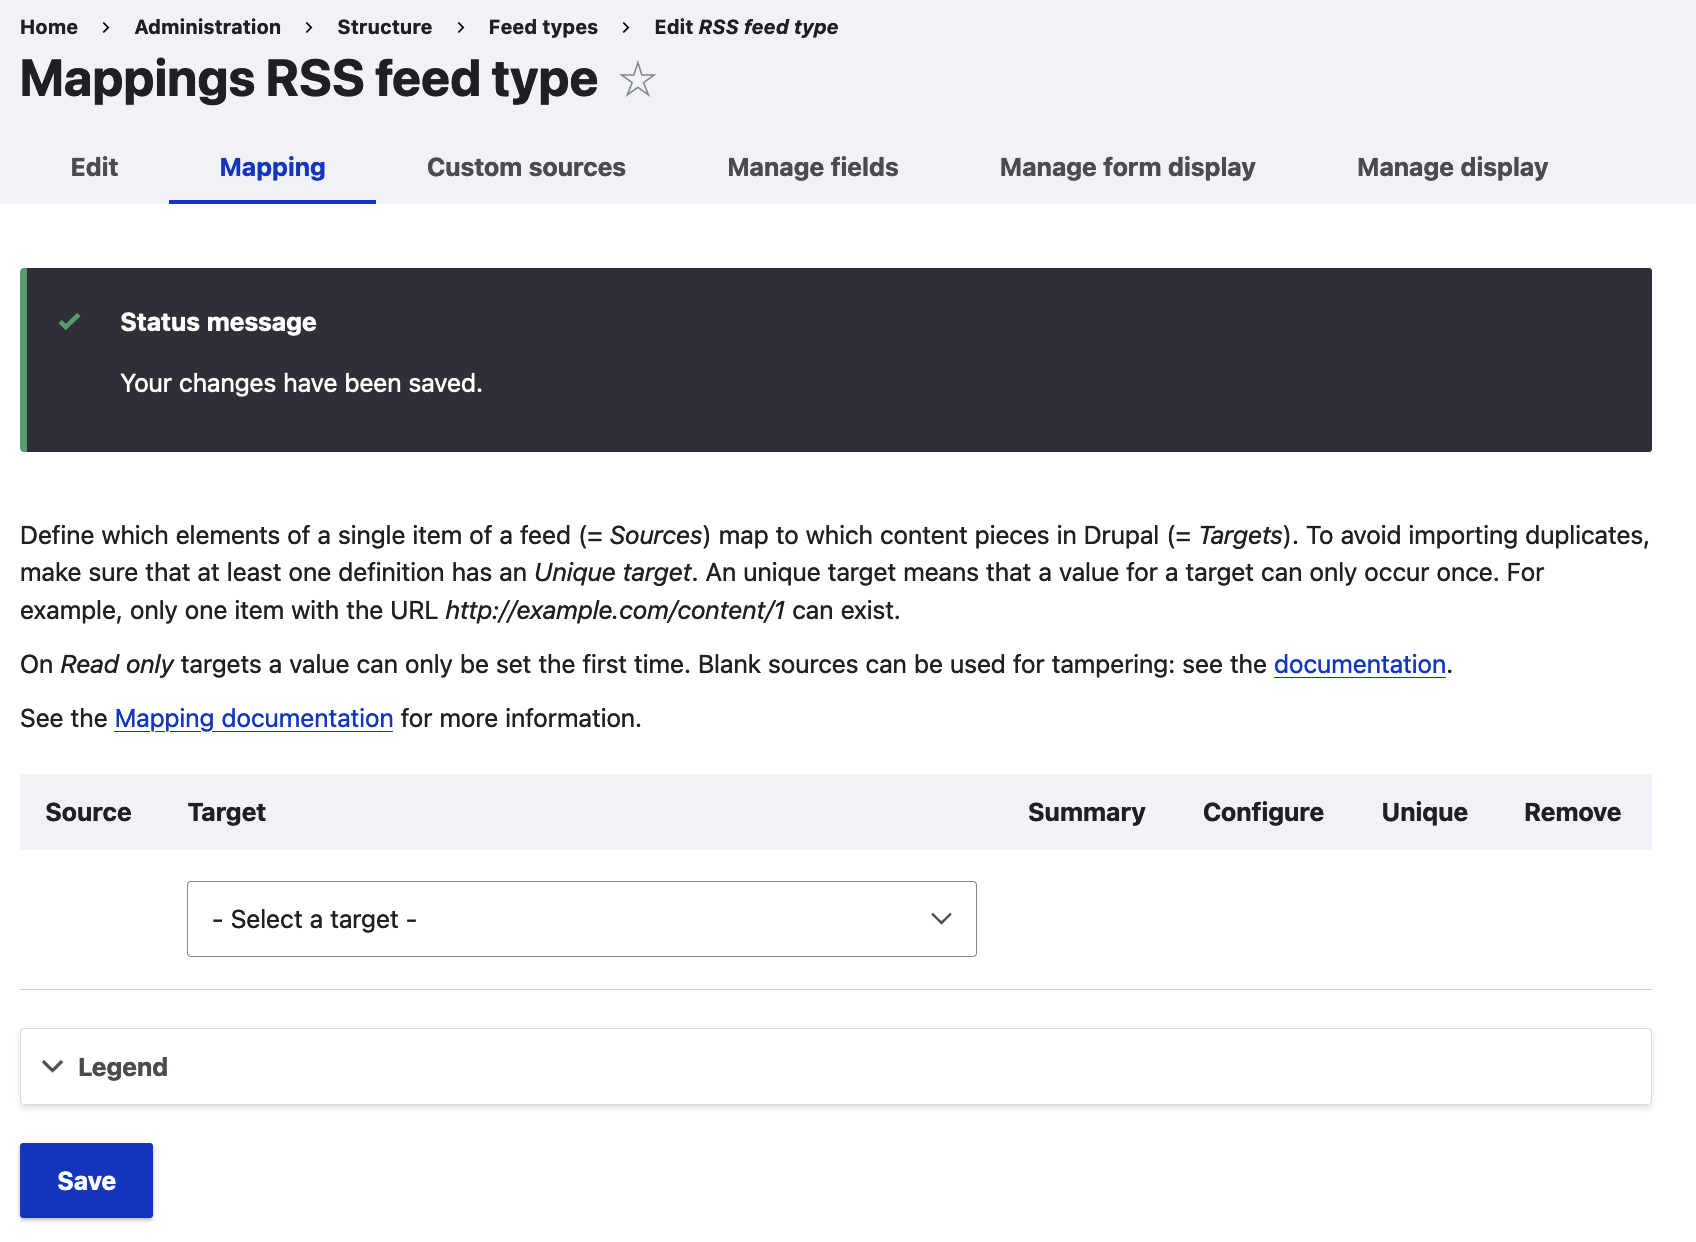
The Target column allows us to choose fields from the content type we previously selected (Article).
The parser we opted in for on the previous screen, RSS/Atom, defines the Source options available on this screen. More specifically, the RSS/Atom format has predefined fields and as a result, as soon as we choose a Target, for example "Title", all the available RSS/Atom properties will appear under the Source column for the item we created, allowing us to choose the appropriate Source for the Target we selected.
On https://www.drupal.org/drupalorg/docs/rss-feeds, you can see various Drupal-oriented RSS feeds. For our tutorial, we'll use Planet Drupal's RSS feed available on the following URL: http://www.drupal.org/planet/rss.xml. Upon inspecting the downloaded XML file from this feed:
<item>
<title>The Drop Times: Drupal.org: A New Initiative for Improved User Onboarding and Role Identification</title>
<link>https://www.thedroptimes.com/37354/drupalorg-new-initiative-improved-user-onboarding-and-role-identification</link>
<description>Delve into Alex Moreno's initiative to revolutionize Drupal.org by capturing user roles to tailor the onboarding experience. This in-depth look discusses community collaboration, sustainability, and innovation, aiming to enhance contributions and user engagement within the Drupal ecosystem. Join the discussion on future strategies for a sustainable Drupal and the community's role in driving change.</description>
<pubDate>Tue, 05 Mar 2024 07:14:00 +0000</pubDate>
</item>...we can clearly see the attributes present in it, all inside distinct <item> tags:
- title
- link
- description
- pubDate
This hint allows us to properly map our content type's fields (Targets) to the feed's Sources:
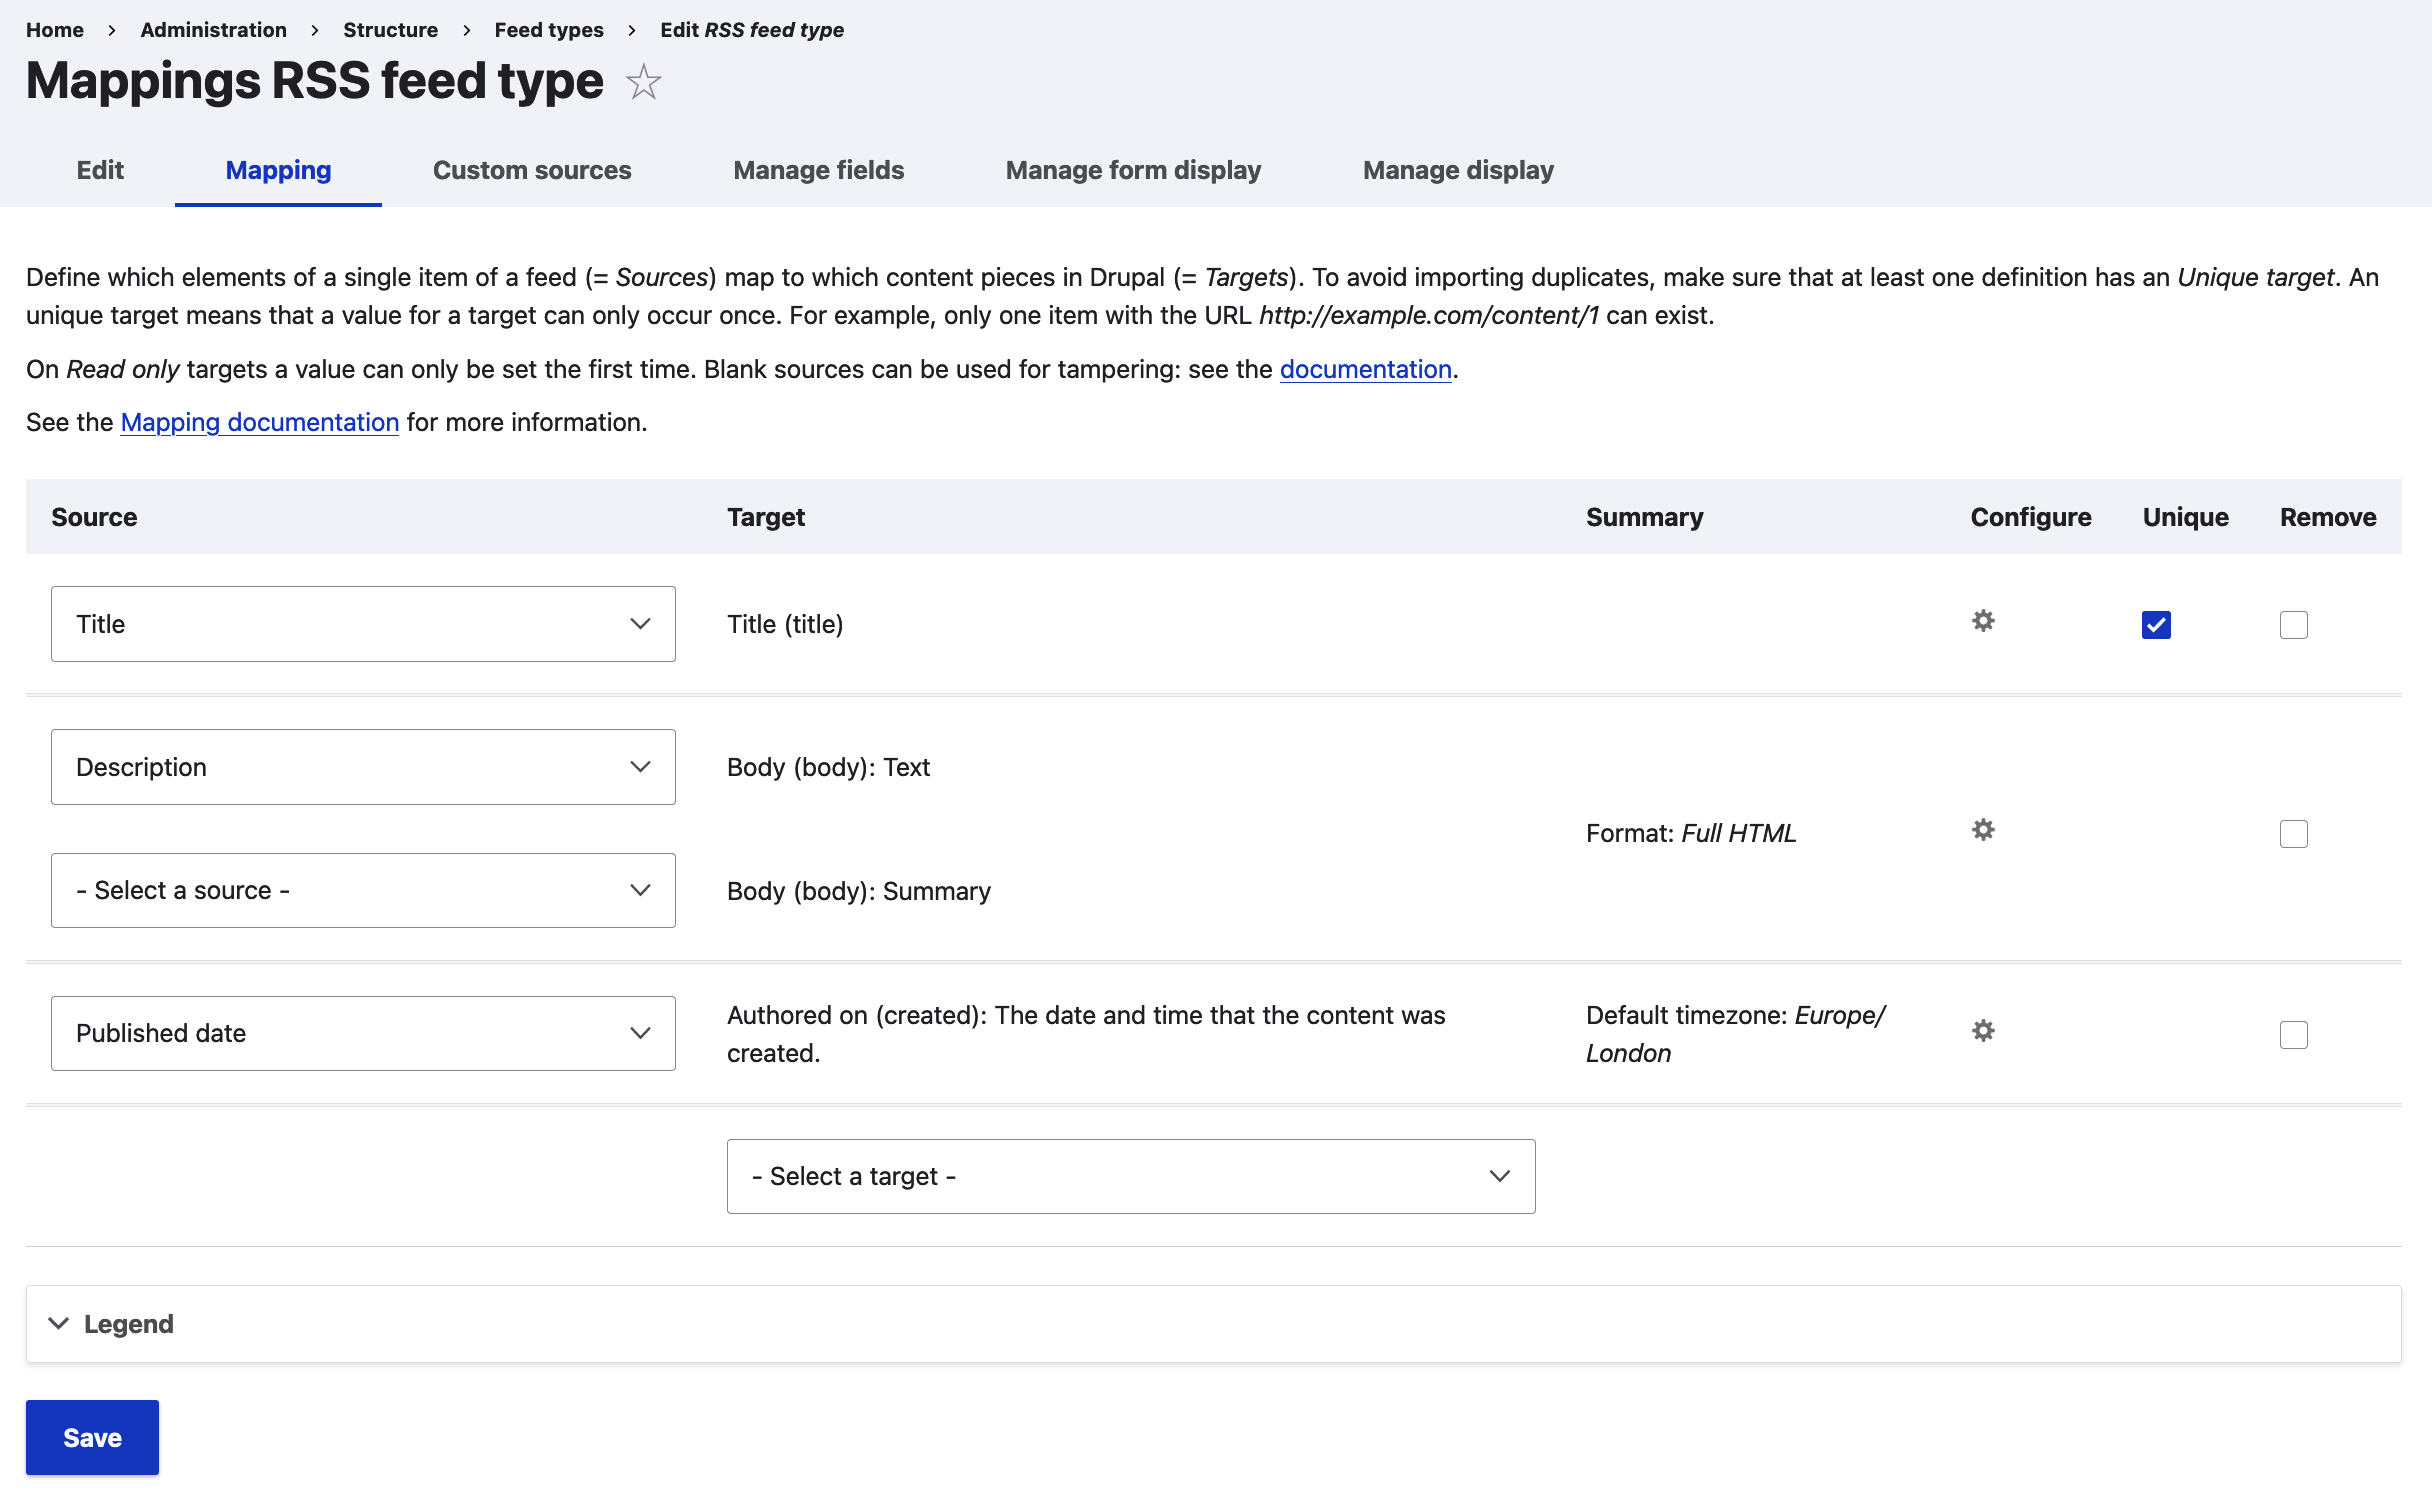
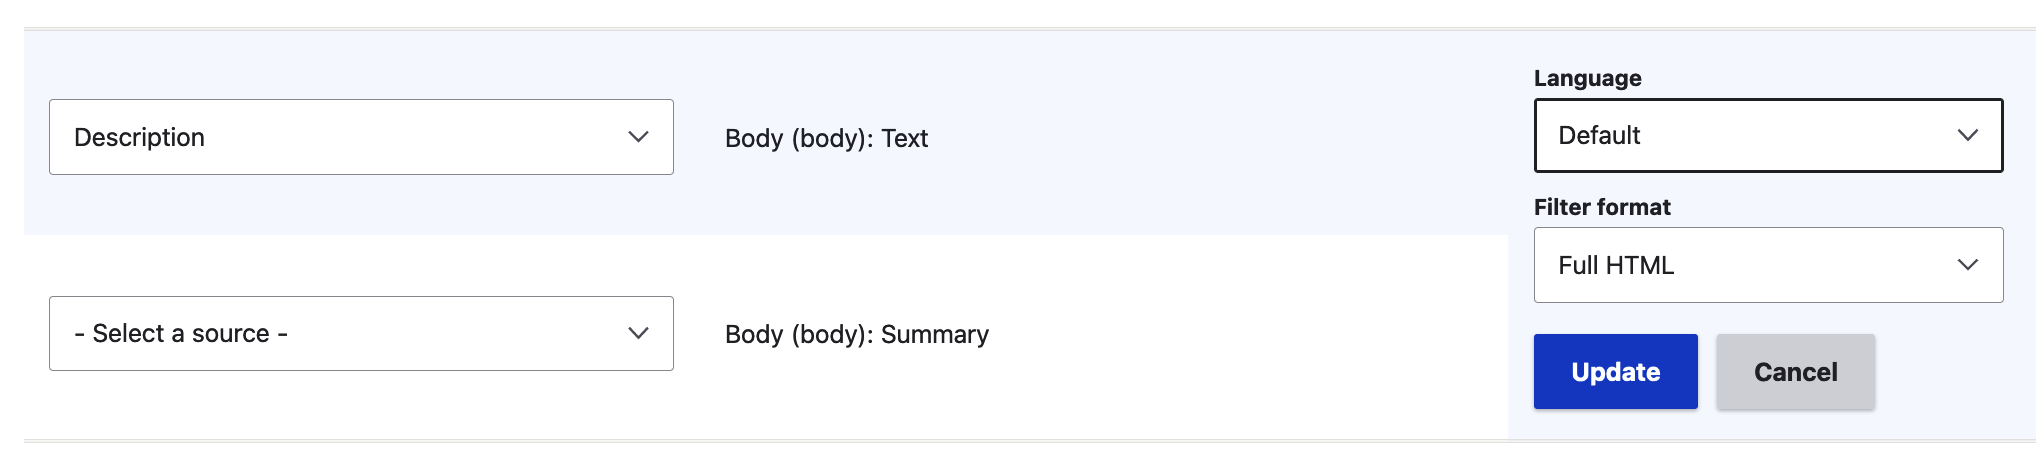
Make sure you also explore the available configuration options for each item in the feed type - you can access them by clicking on the cog icon under the "Configure" column. For example, for the Body target item, you can set the text format to be used when importing a feed item (e.g. "Full HTML"):
You can also leave a Source blank just like we did for the "Body (body): Summary" field. This will result in an empty summary for our Article nodes upon importing our feed items into new content. Blank sources also allow for creating a placeholder to tamper incoming data using the Feeds Tamper module (needs to be installed separately).
3. Creating a feed
Feeds are like nodes and abide by the same rules that govern entities in Drupal. Just like nodes are based on content types, feeds are based on feed types and can have their own fields - even form display and display configuration screens.
Navigate to /feed/add/rss_feed_type (Content > Feeds > + Add feed) to reach the new feed creation screen, based on the feed type we've created and configured:
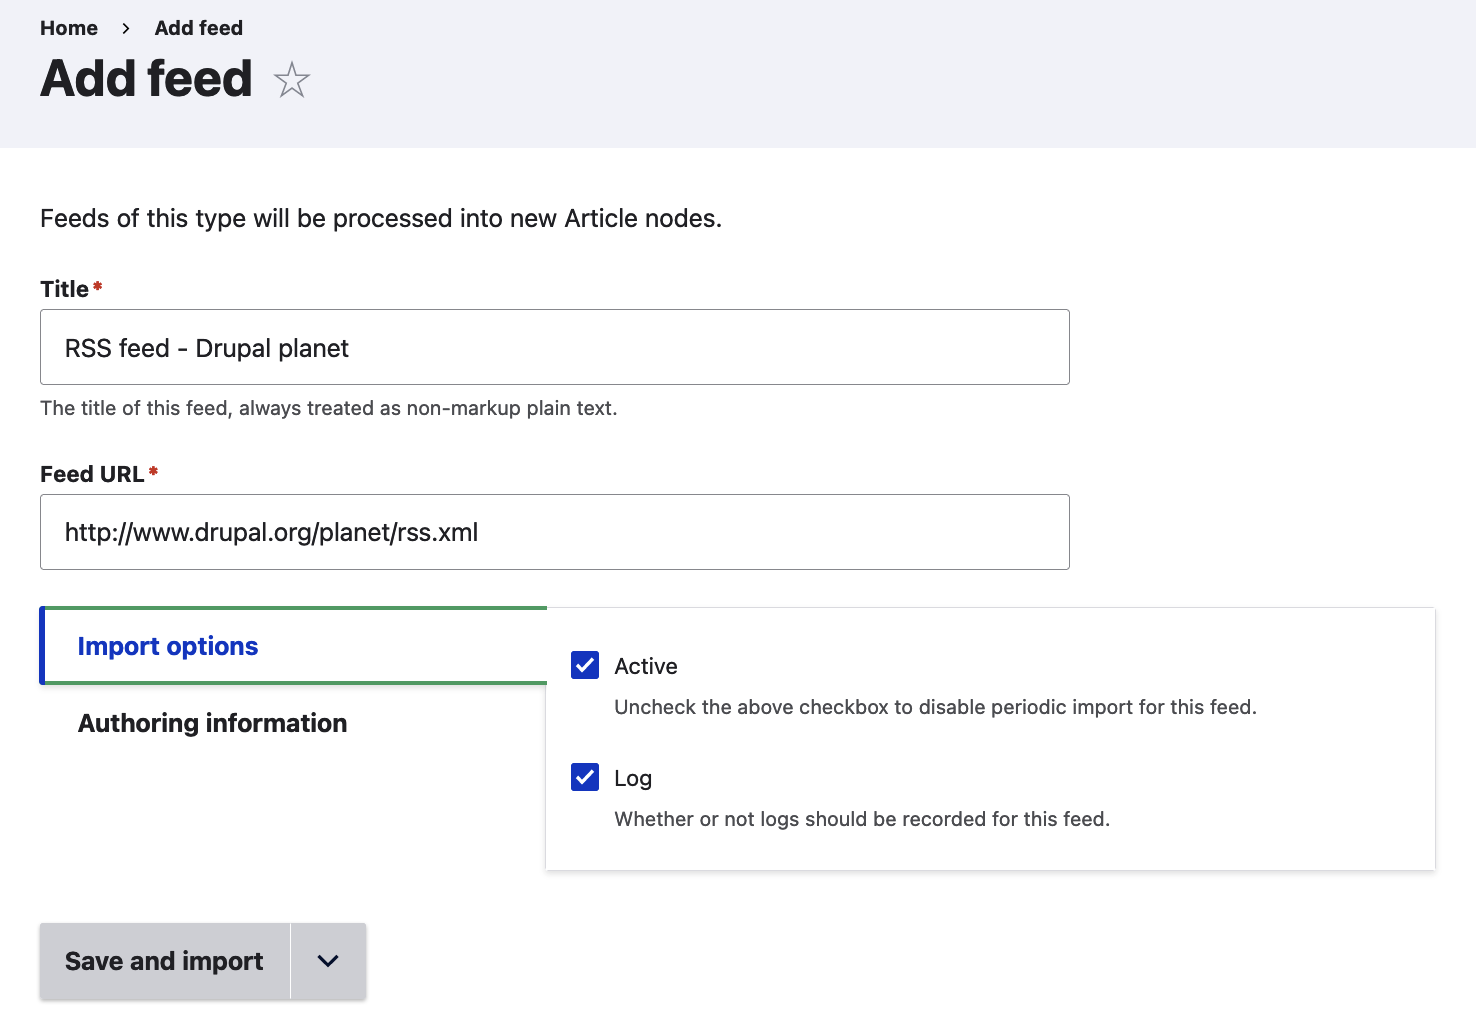
This specific feed will be fetching data from the Drupal planet RSS XML source available at https://www.drupal.org/planeta/rss.xml which is exactly the value we populate the Feed URL field with. We also leave the Import options with their default values and also, under Authoring information, we set the author of the new Article nodes we are expecting to be generated to our desired Drupal user (it can be your current Drupal user or any other user present on your Drupal installation).
Now that we have our first feed ready and configured, we can save it and also import data in one go - read on for the most exciting part!
Importing a feed
By clicking "Save and import", Drupal will reach out to the Drupal Planet RSS feed URL, fetch the data available and create one new Article node for every <item> entry it finds in the RSS XML file. Confirmation of the import is displayed on the next screen, as well as some more useful information:
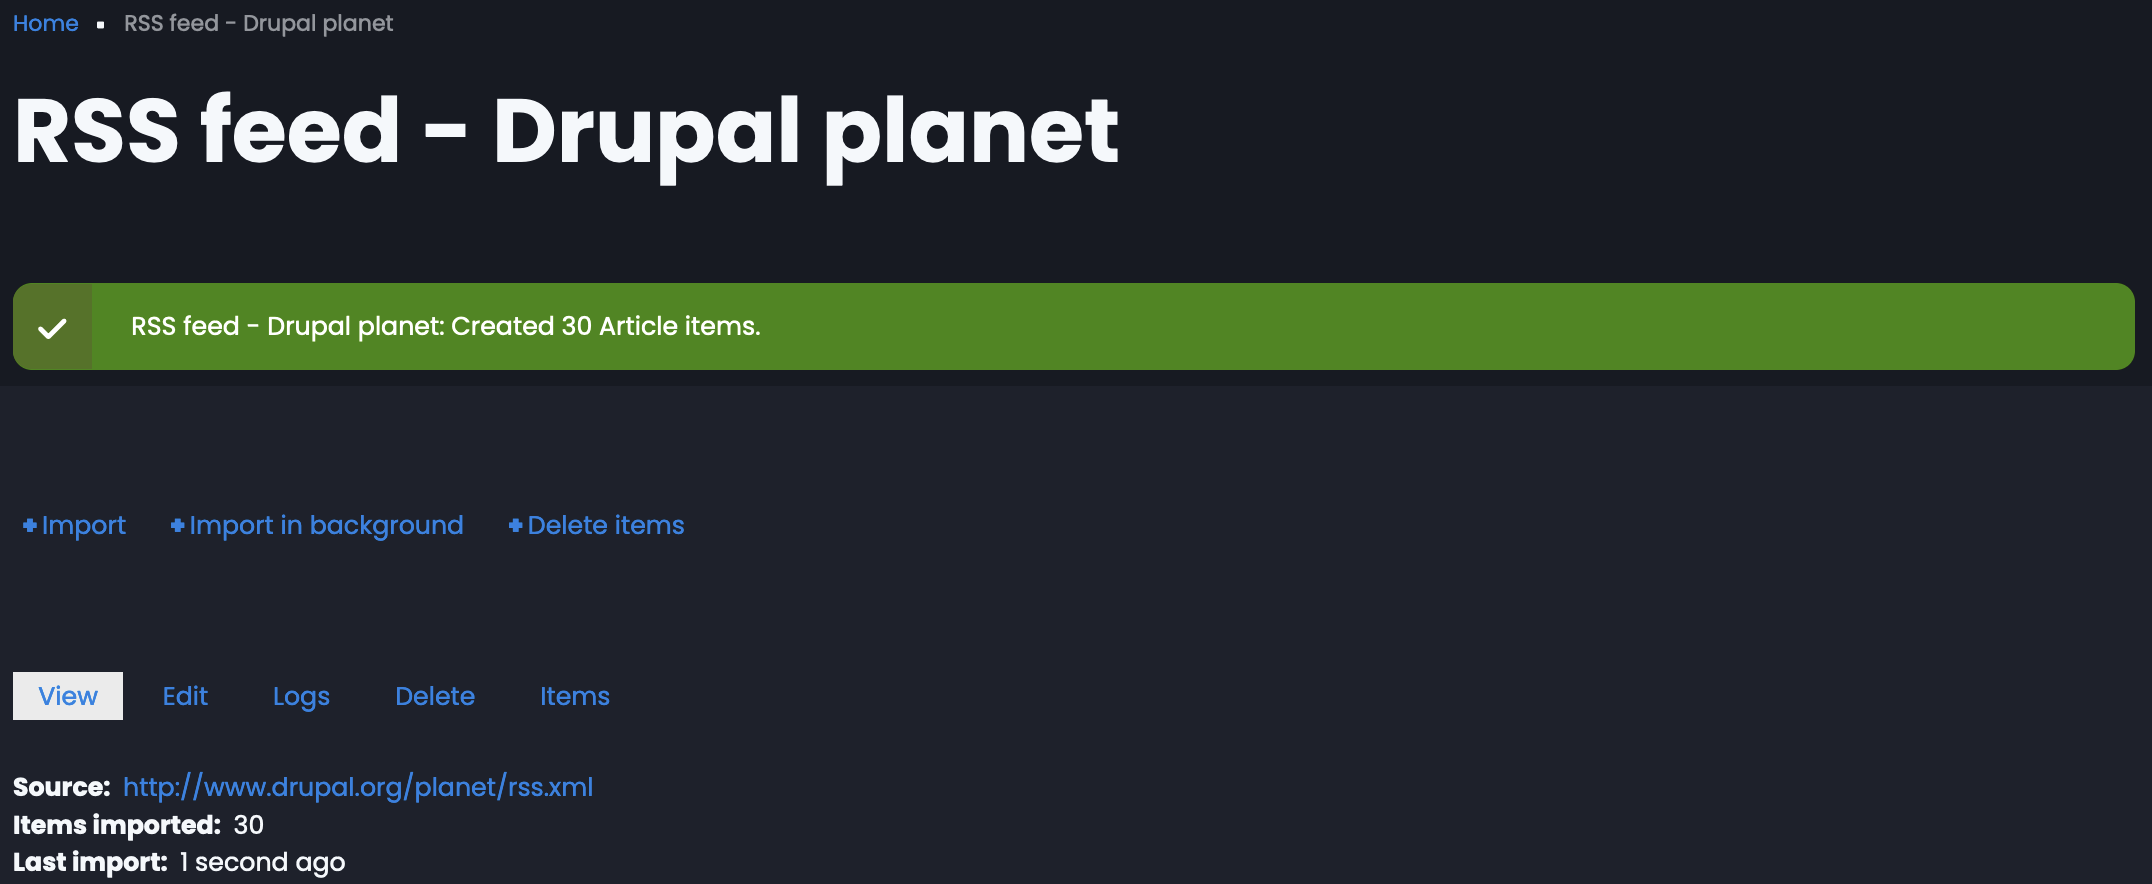
If you've set your feed type to periodically and automatically import data, a "Next import:" line should also be present at the bottom of this page to inform you about the next scheduled run for this feed.
It's time to actually view the content generated by this feed - visit the content screen (/admin/content), filter for "Article" content type nodes and voila! 30 new Article nodes generated on our website:
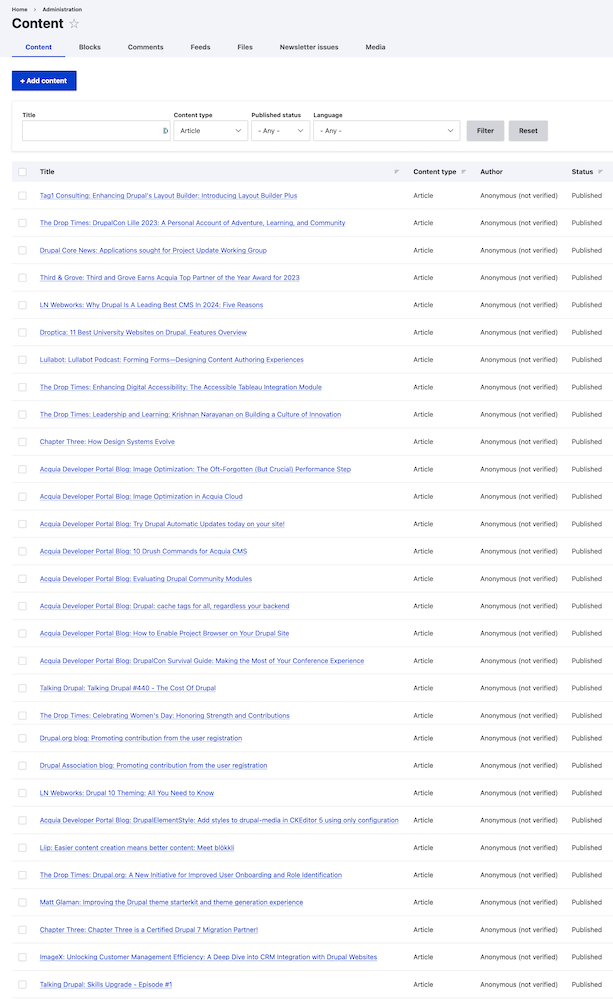
Going through the imported nodes, we can confirm that the feed import has been successfull and all the expected fields have been populated with data. Here's how one of the newly imported Article nodes look like on the front-end:
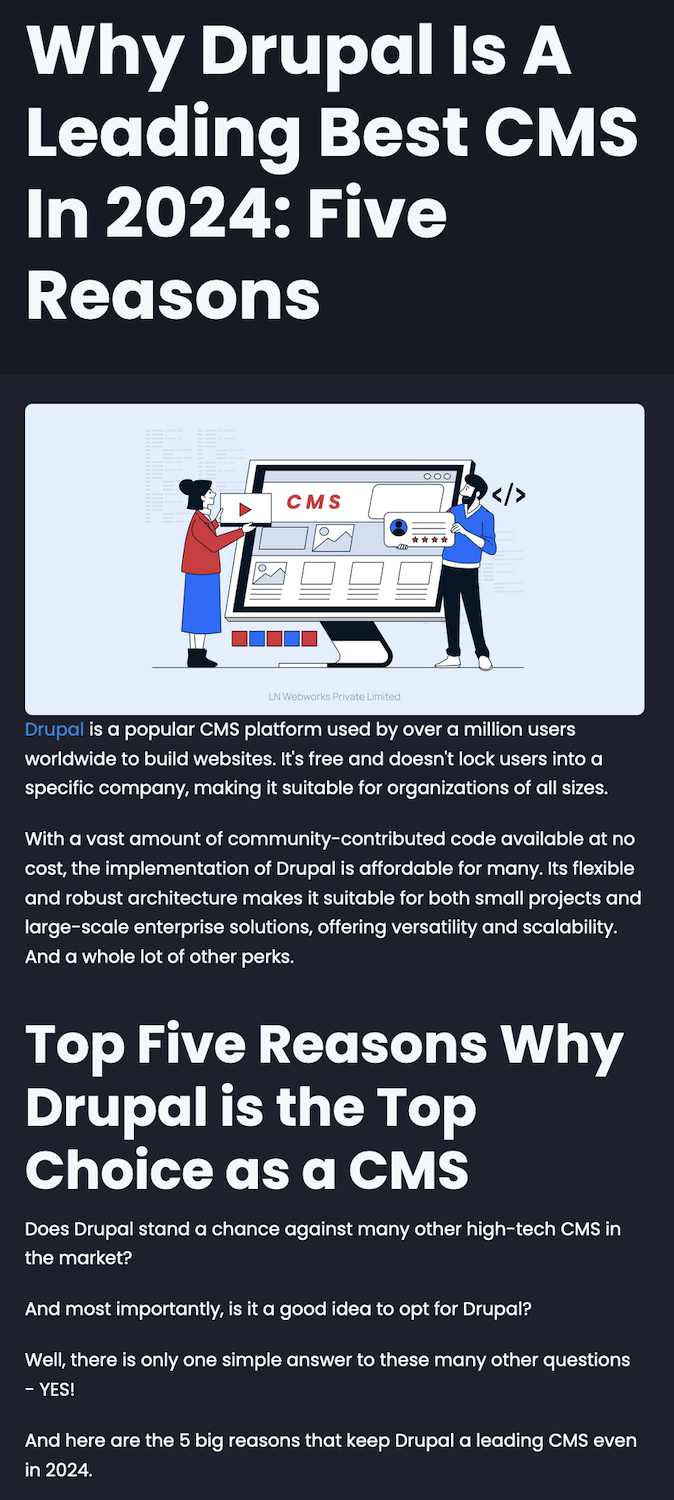
The image on this Article node is rendered on our website too because its URL is part of the rich text content imported into the node's body field. In some cases, RSS feeds might include items with embedded media/files in them. In that case, images, documents or other types of files won't render on our destination site. To resolve this, the Feeds Tamper module can be used to clean the incoming data from orphan files.
Conclusion
We have now created our first Drupal feed and successfully imported our first batch of data in the form of Article nodes. From here, the possibilities are endless! We can set up feeds to periodically import data from various sources online or even create complex data exchange mechanisms between different Drupal websites. Taking this one step further, we can harvest important data found in online sources all around the world and integrate Drupal feeds with ChatGPT to bring in "AI-massaged" content to our website (consider that a hint to an upcoming tutorial!).
ORION WEB can help you design, build and configure beautiful user journeys. Contact us for a free consultation - we'd love to discuss your organisation's digital strategy!